Baby Crochet Blanket: 6 Beautiful Styles to Make
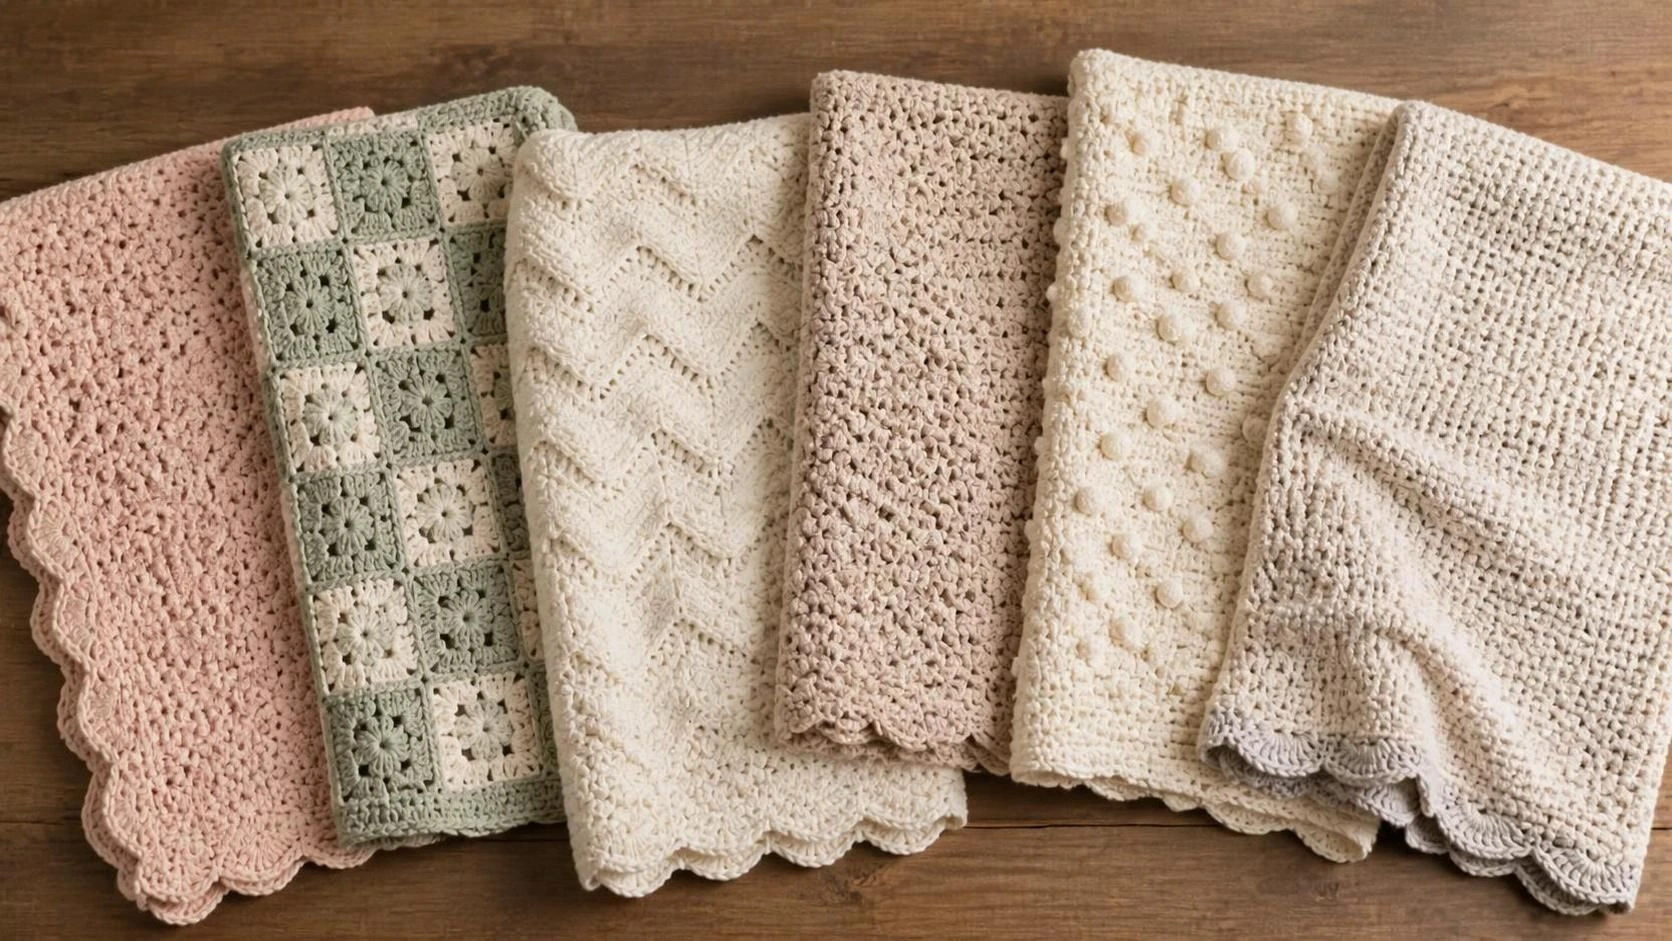
If there’s one project every crocheter eventually makes, it’s a baby blanket. I’ve lost count of how many I’ve stitched over the years, and every single one has taught me something different about texture, drape, or color. The truth is, a baby crochet blanket isn’t just one pattern it’s a whole category of techniques, each with its own look and feel. Some styles lean colorful and playful, others feel soft and heirloom-worthy, and a few are just genuinely fun to work up. Here are 6 beautiful styles worth adding to your queue.
1. Granny Square Baby Blanket
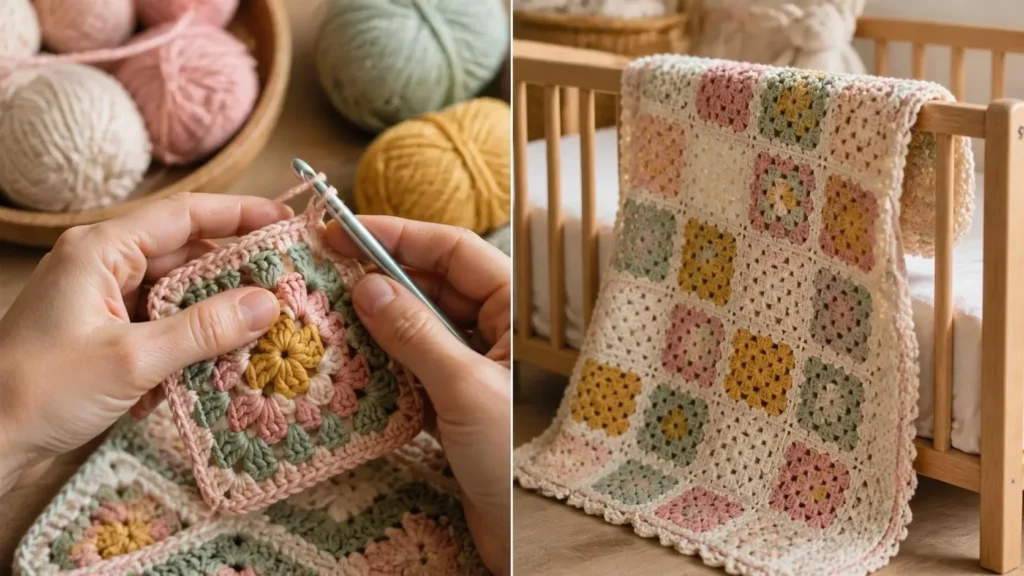
This is where most crocheters start, and for good reason. A granny square baby crochet blanket is endlessly forgiving if one square comes out slightly different in size, it barely shows once everything is joined together. It’s also the easiest style to make with scrap yarn, since each square can be a different color without looking mismatched.
Difficulty Level
Beginner | Estimated Time: 10-15 hours
Materials You’ll Need
- Yarn: DK or worsted weight cotton or acrylic yarn (400-550g)
- Hook Size: 4mm – 5mm
- Additional Items: Scissors, yarn needle, stitch markers
- Optional Embellishments: Contrast border, tassels, scalloped edging
Key Features & Benefits
- Beginner-friendly – simple repeating rounds
- Portable project – easy to work on squares individually
- Great stash-buster for leftover yarn
- Classic, timeless look that never goes out of style
Size & Dimensions
- Width: 75-90cm
- Length: 75-90cm
- Square Size: 12-15cm each
- Yarn Needed: 400-550 grams
Best Color Combinations
- Classic Pastel Mix: Blush + Mint + Cream
- Gender Neutral: Oatmeal + Sage + White
- Bold Multi-Color: Mustard + Terracotta + Navy
Customization & Variations
- Mix multiple colors per square for a scrappy, playful look
- Keep one consistent color scheme for a more coordinated finish
- Add a solid border round to unify a multi-color design
- Join squares with a flat braid join for a decorative seam
- Personalize a center square with the baby’s initials
Perfect For
- Beginners – one of the most approachable blanket styles
- Stash-busters – great use of leftover yarn
- Baby showers – a classic, well-loved handmade gift
- On-the-go crocheting – individual squares are portable
Pro Tips & Maintenance
- Block every square to the exact same size before joining for a neat, even blanket
- Weave in ends as you go rather than saving them all for the end
- Wash gently and lay flat to dry to preserve the shape of the joins
- Store folded rather than rolled to avoid permanent creases in the squares
2. C2C (Corner to Corner) Baby Blanket
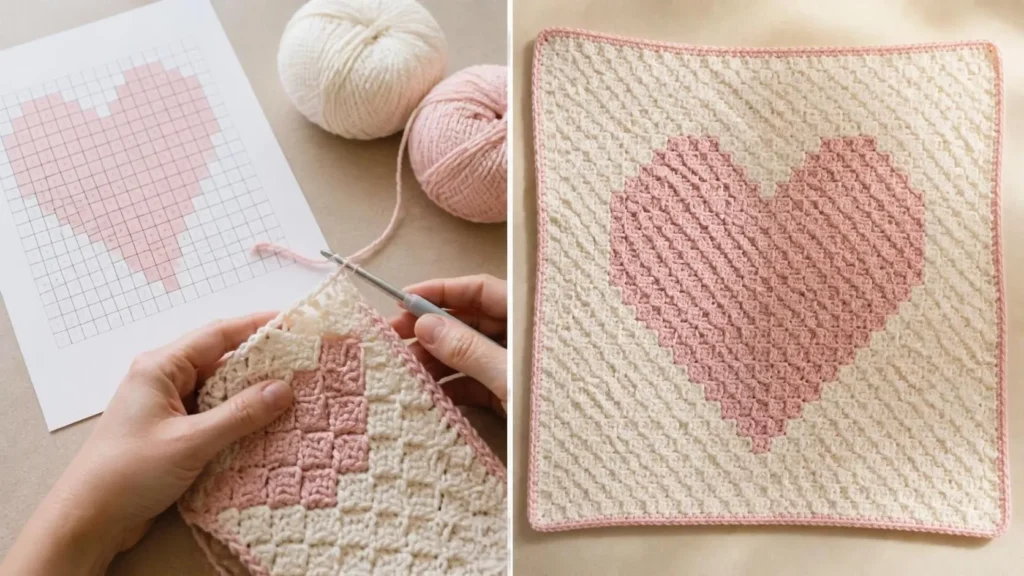
If you want your baby crochet blanket to look like a piece of art rather than a texture study, corner-to-corner is the technique to reach for. It’s essentially a way to “pixelate” an image in crochet, which means you can create anything from a simple heart to a full graphic scene.
Difficulty Level
Beginner to Intermediate | Estimated Time: 15-20 hours
Materials You’ll Need
- Yarn: DK weight cotton or acrylic yarn in multiple colors (450-600g)
- Hook Size: 4mm – 4.5mm
- Additional Items: Scissors, yarn needle, C2C graph or pattern chart
- Optional Embellishments: Solid color border, fringe trim
Key Features & Benefits
- Graphic, image-based designs not possible with standard stitches
- Highly personalizable with names, animals, or shapes
- Worked diagonally in a satisfying repeating pattern
- A real conversation piece once finished
Size & Dimensions
- Width: 75-90cm
- Length: 75-90cm
- Yarn Needed: 450-600 grams
Best Color Combinations
- Soft Graphic: White background + Blush motif
- Bold Statement: Navy background + White motif
- Gender Neutral: Cream background + Sage motif
Customization & Variations
- Personalize with the baby’s name spelled out in the design
- Create a simple animal silhouette (elephant, bear, bunny)
- Add a solid border in a coordinating color to frame the graphic
- Use an ombré color transition instead of a picture design
- Add fringe along the bottom edge for extra texture
Perfect For
- Personalized gifts – names and custom graphics
- Beginners ready to try a chart-based technique
- Nursery statement pieces – doubles as wall-worthy decor
- Gender reveal or announcement gifts
Pro Tips & Maintenance
- Follow a C2C graph carefully, miscounting even one block throws off the whole design
- Keep consistent tension throughout, since C2C shows uneven stitches more visibly than other techniques
- Block the finished piece to square up the diagonal edges
- Hand wash gently to protect any color-work sections from bleeding
3. Ripple/Chevron Baby Blanket
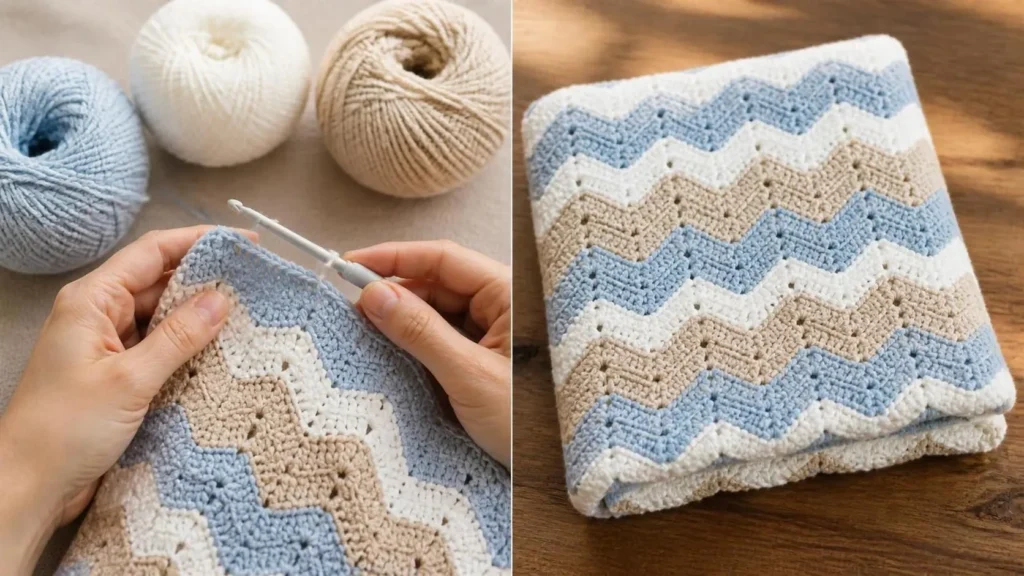
There’s something almost hypnotic about watching a ripple pattern build row by row. This style of baby crochet blanket relies on a repeating wave of increases and decreases, which creates that signature zigzag texture without needing to switch colors constantly.
Difficulty Level
Beginner to Intermediate | Estimated Time: 12-16 hours
Materials You’ll Need
- Yarn: DK or worsted weight cotton or acrylic yarn (400-550g)
- Hook Size: 4mm – 5mm
- Additional Items: Scissors, yarn needle, stitch markers
- Optional Embellishments: Scalloped edging, contrast border round
Key Features & Benefits
- Visually striking texture with minimal technical difficulty
- Repeating pattern is easy to memorize after a few rows
- Looks great in both solid and multi-color yarn
- Fast-growing project once the rhythm clicks
Size & Dimensions
- Width: 75-90cm
- Length: 75-90cm
- Yarn Needed: 400-550 grams
Best Color Combinations
- Ocean Wave: Sky Blue + White + Sand
- Soft Sunset: Blush + Peach + Cream
- Gender Neutral: Sage + Oatmeal + White
Customization & Variations
- Alternate two or three colors for a classic striped ripple effect
- Keep it a single solid color for a more subtle textured look
- Adjust the wave depth for sharper or softer chevron points
- Add a scalloped border to soften the zigzag edges
- Make a matching lovey-sized version in the same pattern
Perfect For
- Beginners wanting a slightly more textured project than granny squares
- Colorful nursery themes – the wave pattern loves multi-color yarn
- Gender-neutral gifting – works beautifully in any palette
- Crocheters who enjoy a rhythmic, meditative pattern
Pro Tips & Maintenance
- Count stitches carefully at the start and end of each row to keep the chevron points symmetric
- Block firmly to help the wave pattern lie flat rather than curling at the peaks
- Wash gently to preserve the crispness of the ripple texture
- Store folded along the natural wave lines to avoid awkward creases
4. Shell Stitch Baby Blanket
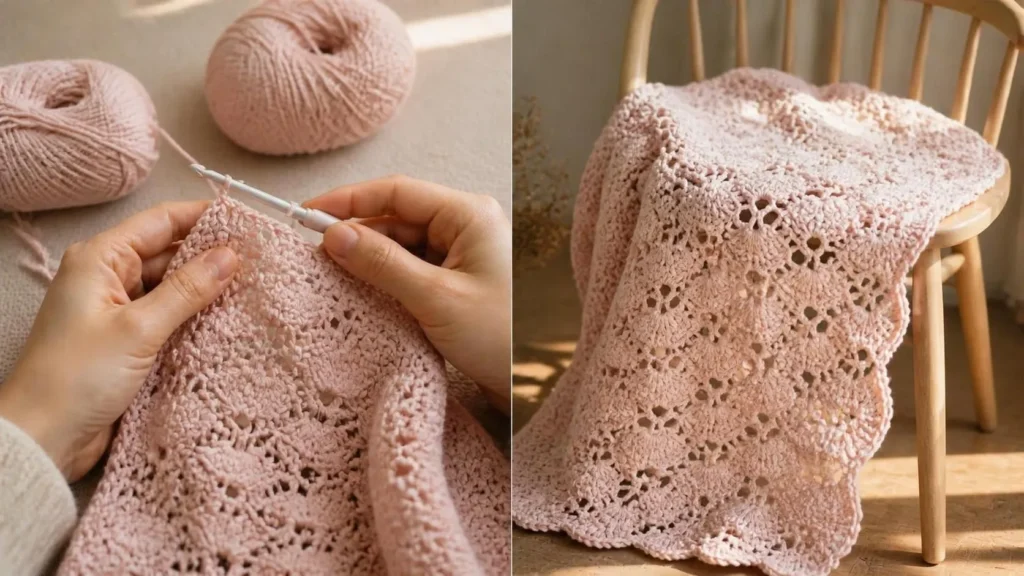
For a softer, more romantic look, the shell stitch is one of my favorite ways to make a baby crochet blanket feel a little more elevated. The layered, scalloped texture reads as delicate and heirloom-worthy, even though the stitch itself is fairly simple to learn.
Difficulty Level
Beginner to Intermediate | Estimated Time: 10-14 hours
Materials You’ll Need
- Yarn: DK weight cotton or cotton-acrylic blend yarn (400-500g)
- Hook Size: 3.5mm – 4.5mm
- Additional Items: Scissors, yarn needle, stitch markers
- Optional Embellishments: Satin ribbon trim, scalloped border
Key Features & Benefits
- Elegant, feminine texture with a delicate drape
- Repeating shell pattern is easy to memorize
- Works beautifully in soft pastels or classic neutrals
- Looks polished with minimal extra embellishment needed
Size & Dimensions
- Width: 75-85cm
- Length: 75-85cm
- Yarn Needed: 400-500 grams
Best Color Combinations
- Romantic Pastel: Blush Pink + Ivory
- Soft Neutral: Cream + Beige
- Gentle Contrast: Lavender + White
Customization & Variations
- Alternate two colors for a subtle striped shell effect
- Add a satin ribbon woven through the top border
- Use a finer yarn weight for an even more delicate drape
- Add a scalloped edge to echo the shell texture along the border
- Make a matching bonnet in the same stitch pattern
Perfect For
- Christenings and formal baby events
- Baby girl nurseries with a romantic aesthetic
- Intermediate beginners ready for a textured stitch
- Heirloom-style keepsake gifts
Pro Tips & Maintenance
- Keep tension slightly looser than usual to let the shell texture drape naturally
- Block gently by hand rather than pinning tightly, which can flatten the dimensional shells
- Hand wash only if a ribbon trim is added, to protect the ribbon from the washing machine
- Store folded with tissue paper to help the shells keep their shape between uses
5. Bobble Stitch Baby Blanket
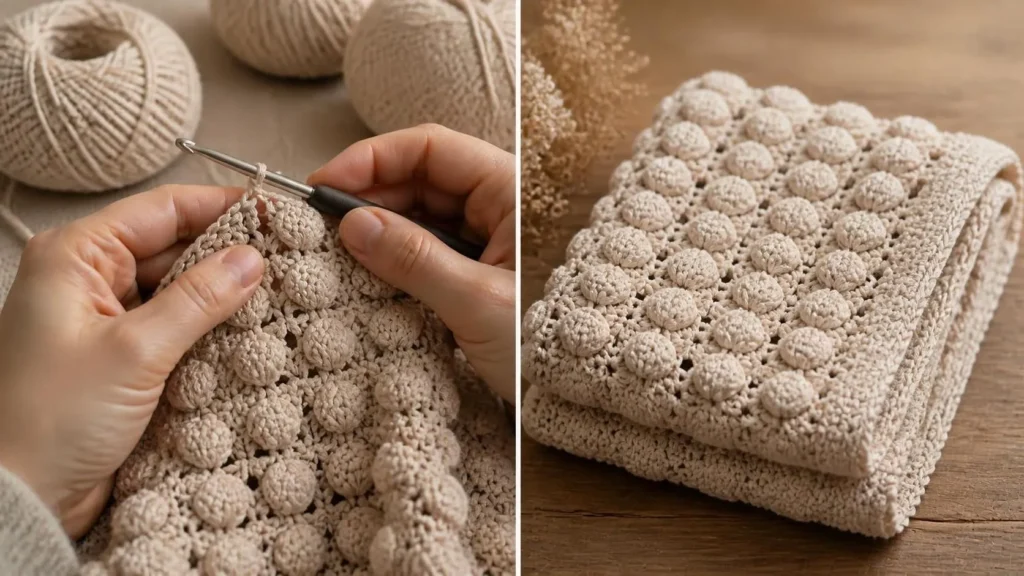
If texture is what you’re after, nothing delivers quite like the bobble stitch. This style of baby crochet blanket has a wonderful tactile, three-dimensional quality that babies genuinely seem to enjoy touching and grabbing at during tummy time.
Difficulty Level
Intermediate | Estimated Time: 14-18 hours
Materials You’ll Need
- Yarn: Worsted weight cotton or acrylic yarn (500-650g)
- Hook Size: 4.5mm – 5mm
- Additional Items: Scissors, yarn needle, stitch markers
- Optional Embellishments: Solid border round, contrast bobble color
Key Features & Benefits
- Dimensional, tactile texture that’s fun for baby to explore
- Denser fabric offers extra warmth
- Looks impressive while using a fairly repetitive stitch pattern
- Works well in a single solid color to let the texture shine
Size & Dimensions
- Width: 75-90cm
- Length: 75-90cm
- Yarn Needed: 500-650 grams
Best Color Combinations
- Classic Neutral: Oatmeal (lets texture take center stage)
- Soft Contrast: Cream body + Blush bobbles
- Gender Neutral: Sage Green (solid, textured)
Customization & Variations
- Space bobbles evenly across the whole blanket for an all-over texture
- Cluster bobbles into a simple pattern, like a border or center motif
- Use a contrasting color just for the bobbles for extra visual pop
- Alternate bobble rows with plain rows for a lighter, less dense fabric
- Make a smaller lovey-sized version using the same bobble technique
Perfect For
- Sensory-focused nursery items – engaging texture for tummy time
- Cooler-climate babies – denser fabric offers more warmth
- Intermediate crocheters – practicing a new textured stitch
- Solid-color minimalist nurseries – texture does the visual work
Pro Tips & Maintenance
- Keep consistent bobble size by counting stitches carefully in each cluster
- This style uses more yarn than a flat stitch, so buy a little extra to be safe
- Wash on a gentle cycle to avoid excess friction flattening the bobbles over time
- Air dry flat, gently reshaping the bobbles by hand while damp
6. Lovey / Security Blanket
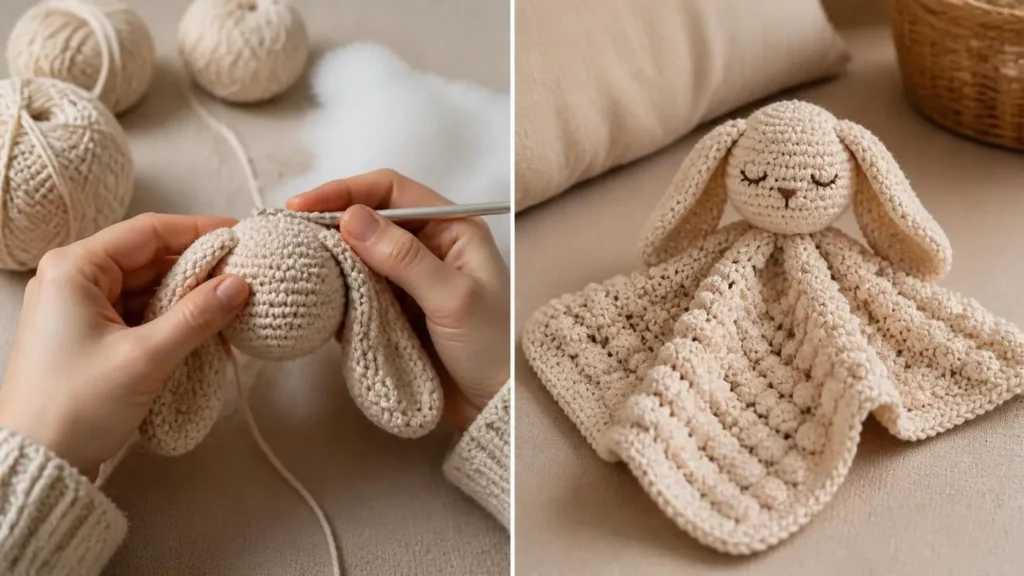
Not every baby crochet blanket needs to be full-sized. The lovey is a small, portable comfort blanket often paired with a stuffed animal head that becomes a genuine companion piece for a baby as they grow into a toddler.
Difficulty Level
Beginner | Estimated Time: 3-5 hours
Materials You’ll Need
- Yarn: Soft baby-safe DK weight yarn (75-125g)
- Hook Size: 3.5mm – 4mm
- Additional Items: Polyester fiberfill (for the animal head), yarn needle, safety eyes or embroidery floss
- Optional Embellishments: Satin blanket backing, embroidered name tag
Key Features & Benefits
- Small, portable size – easy for little hands to carry
- Quick project – finished in a single sitting
- Combines a soft blanket with a comforting animal companion
- A meaningful keepsake that often lasts well into toddlerhood
Size & Dimensions
- Blanket Size: 30-35cm x 30-35cm
- Animal Head: 8-10cm diameter
- Yarn Needed: 75-125 grams
Best Color Combinations
- Soft Neutral: Cream + Tan
- Gentle Pastel: Blush + White
- Gender Neutral: Sage Green + Ivory
Customization & Variations
- Choose different animal heads (bunny, bear, elephant) for the same blanket base
- Add a satin fabric backing for extra sensory softness
- Personalize with a small embroidered name tag in one corner
- Make a matching set with a larger companion blanket
- Add a small crinkle or rattle element for sensory play
Perfect For
- Newborns growing into toddlers – a lasting comfort item
- Travel and outings – small enough to bring anywhere
- Beginners – a quick, satisfying first project
- Personalized baby gifts
Pro Tips & Maintenance
- Always embroider the animal’s facial features rather than using small attachable safety eyes for infants
- Keep the blanket portion light and simple so it doesn’t overwhelm the animal head
- Wash regularly by hand, since loveys get carried and dropped often
- Reshape the animal head gently while damp to keep its form after washing
Conclusion: A Blanket Style for Every Nursery
Whichever technique you choose, a handmade baby crochet blanket carries a kind of warmth that a store-bought one just can’t match. Whether you’re drawn to the classic charm of granny squares, the graphic punch of C2C, or the tactile comfort of bobble stitch, each of these six styles brings something a little different to the nursery and to the hands that made it.
Looking for more handmade inspiration? Explore our other collections, including our baby crochet ideas and baby crochet patterns by season, for even more projects to add to your list.
Ready to start your next baby crochet blanket? Pick the style that speaks to you most, grab your yarn, and let’s get stitching.
Your next handmade baby keepsake is just a few stitches away. Let’s get hooking!