Nurse Keychain Crochet Pattern: Step-by-Step Project Guide
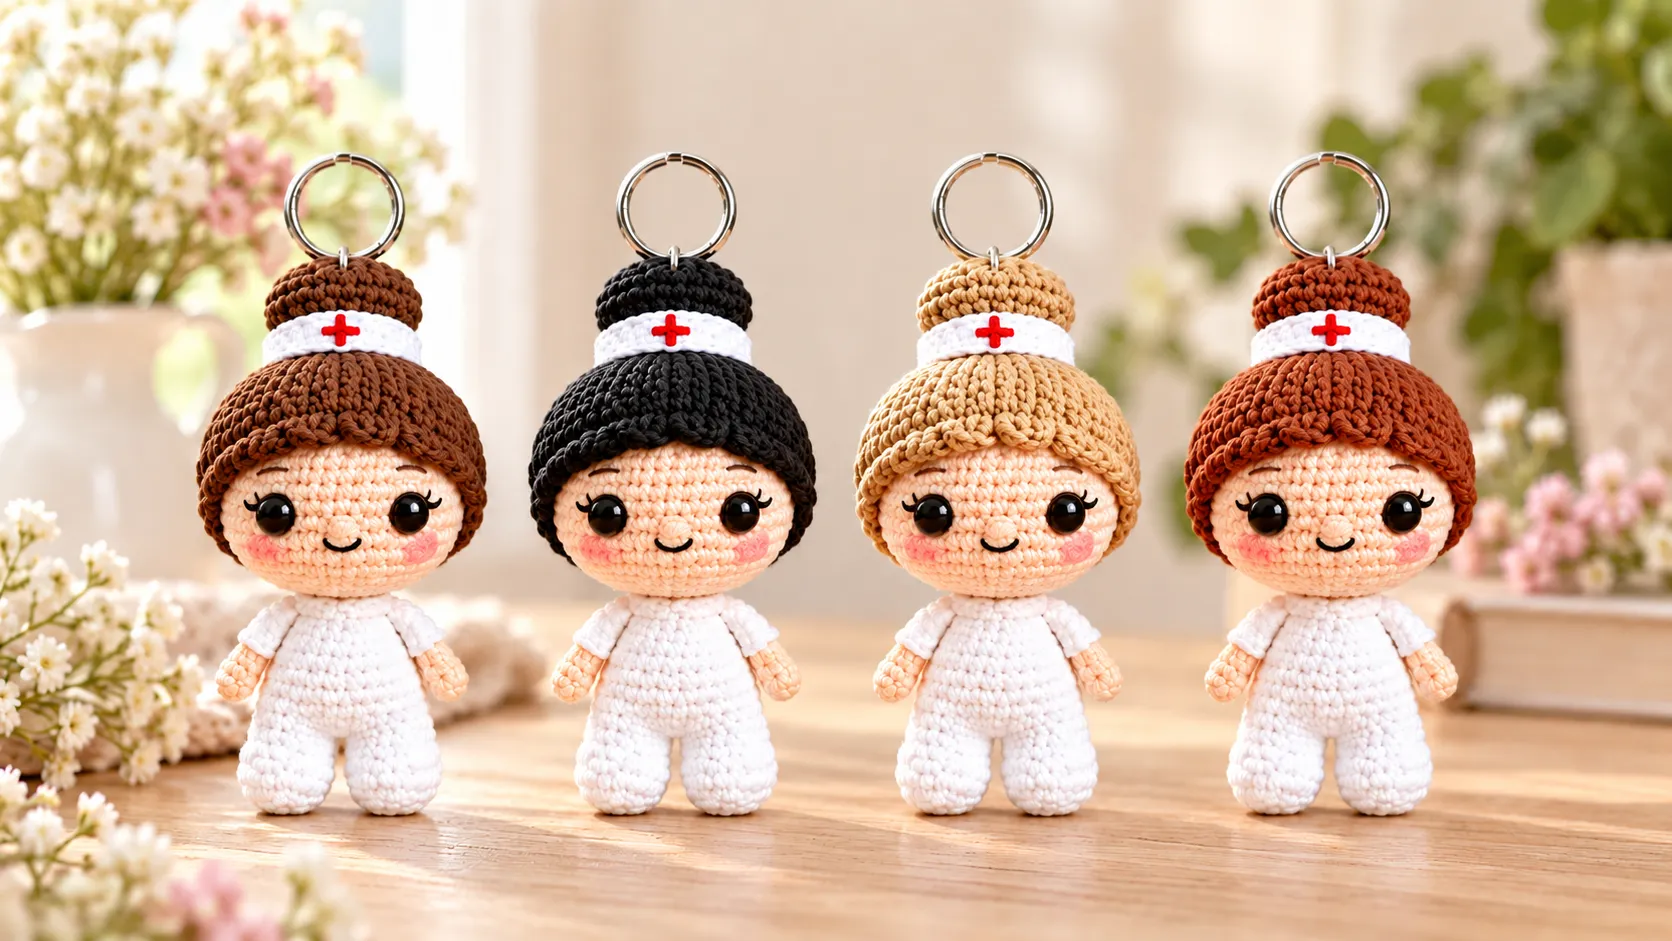
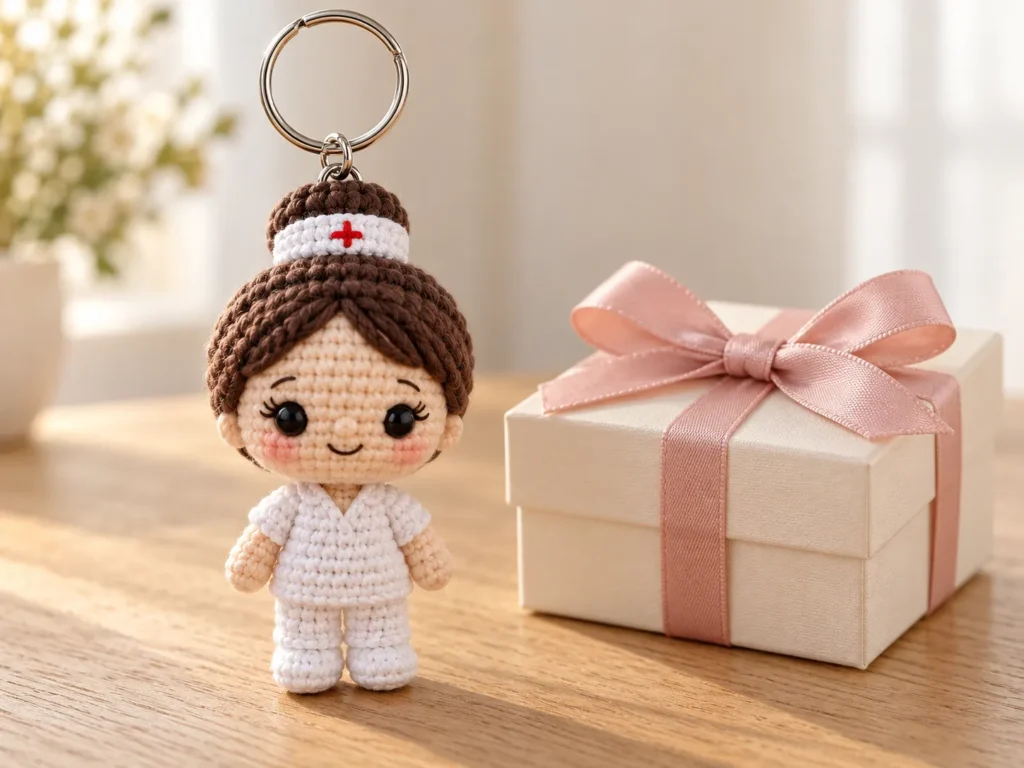
A handmade gift can say a lot without taking up much space. With a little white uniform, a rounded face, and a neat hair bun, this crochet nurse keychain makes a personal keepsake for someone who spends their days caring for others.
You might make one for a nursing graduate, a colleague, or a nurse who helped your family through a difficult time. Choosing a familiar hair color and skin tone adds a thoughtful touch to the finished character.
This nurse keychain crochet pattern begins with a continuous body-and-head piece. The arms, legs, hair cap, bun, and decorative band are made separately and attached during finishing.
Below, you’ll find a step-by-step overview of the construction, materials, and details to watch as you work. The complete round-by-round instructions and stitch counts are available in the paid PDF pattern. This article is a companion guide rather than the full pattern.
Ready to make a thoughtful handmade gift?
Get the Nurse Keychain Crochet Pattern PDF → [Click here]
Table of Contents
About This Nurse Keychain Crochet Pattern
This design combines a small amigurumi character with practical keychain hardware. The white outfit establishes the nurse theme, while the hairstyle and facial details give you room to personalize it.
One useful construction detail is that the head grows directly from the body. You do not make a separate head and sew it onto the neck.
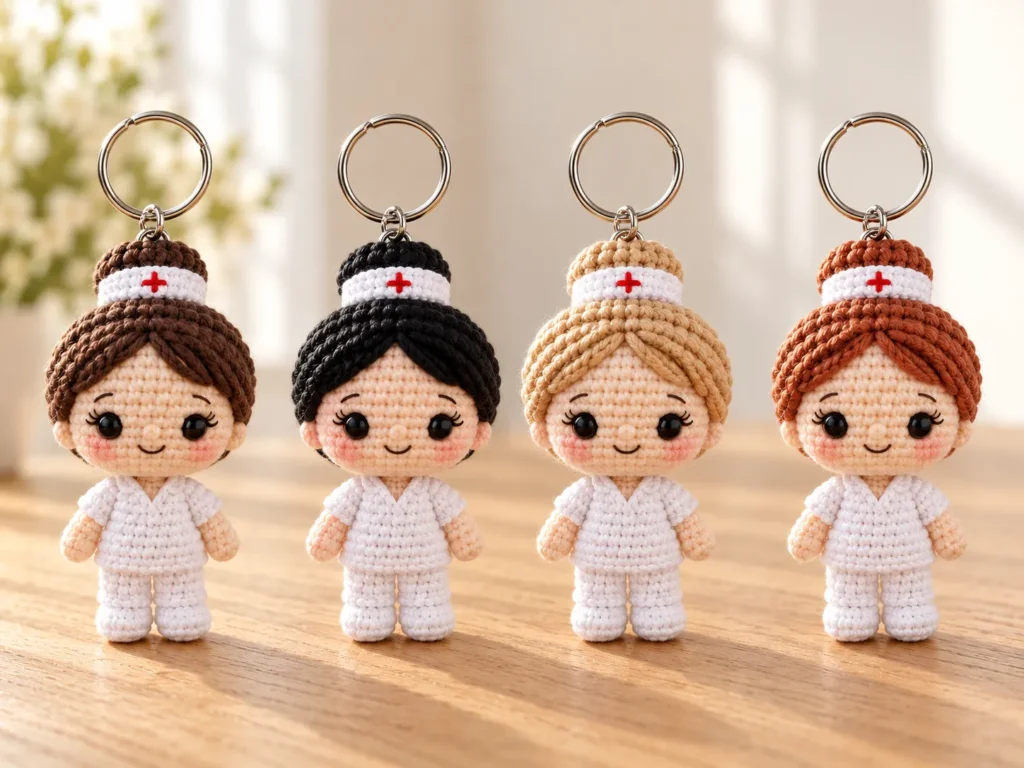
The PDF includes one pattern with four hair-color ideas: cocoa brown, midnight black, honey blonde, and copper red. These are styling variations of the same design, not four different patterns.
| Project detail | What to expect |
|---|---|
| Project type | Decorative amigurumi keychain |
| Hook listed | 2.5 mm |
| Terminology | US crochet terms, with Portuguese equivalents included |
| Main construction | Body and head worked as one continuous piece |
| Separate pieces | Arms, legs, hair cap, bun, and decorative band |
| Finishing | Stuffing, embroidery, sewing, and keyring attachment |
| Finished measurements | Not specified in the PDF |
| Completion time | Not specified; depends on experience and finishing pace |
For this project, it helps to be comfortable with small stitches, continuous rounds, and sewing pieces together. The shaped hairline also uses taller crochet stitches.
Materials and Tools You’ll Need
Prepare your supplies before starting the nurse keychain crochet pattern. Having the hardware and finishing yarn nearby makes it easier to check proportions as the character develops.
Yarn Colors
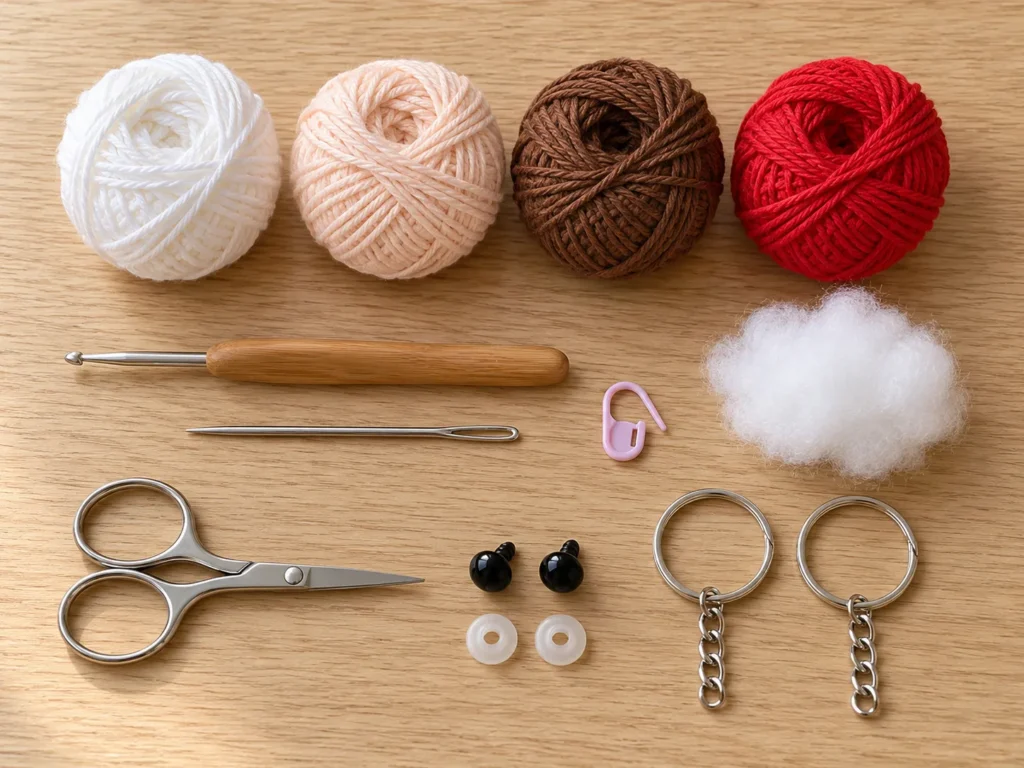
The design uses:
- White for the uniform, legs, sleeves, and decorative band.
- Your chosen skin tone for the head and hands.
- Brown or another hair color for the hair cap and bun.
- Red for the small embroidered detail shown in the pattern.
- Suitable embroidery yarn or thread for optional facial details.
The PDF specifies amigurumi yarn without giving an exact fiber composition, yarn weight, or quantity. Choose compatible yarns across the different colors so the pieces remain in proportion.
Tools and Notions
You will also need:
- A 2.5 mm crochet hook.
- A tapestry needle.
- Scissors.
- Polyester stuffing.
- A stitch marker.
- Keychain hardware.
- Strong thread for attaching the hardware.
- Safety eyes in the size designation listed in the PDF.
- Optional blush or a suitable textile coloring product for the cheeks.
The eye size is given as “No. 11” in the source. Confirm the sizing system with your supplier rather than assuming that designation always means the same measurement.
This is a decorative keychain with small parts, not a toy for babies or young children.
Stitches and Techniques to Know
The main body uses single crochet, increases, and decreases. Other sections introduce loop-specific stitches and taller stitches for shaping.
The PDF includes these abbreviations:
| Abbreviation | Meaning |
|---|---|
| MR | Magic ring |
| ch | Chain |
| sc | Single crochet |
| inc | Increase |
| dec | Decrease |
| sl st | Slip stitch |
| hdc | Half double crochet |
| dc | Double crochet |
| tr | Treble crochet |
| FLO | Front loop only |
| BLO | Back loop only |
Read the abbreviation page before beginning, especially if you normally follow UK crochet terminology.
For the continuous rounds, mark the first stitch and move the marker as you progress. Do not join rounds unless the written instructions call for it.
Before You Begin
Check Your Fabric
The stitches should be dense enough to keep stuffing hidden. If you can see large gaps, adjust your hook or tension before making the full piece.
Avoid forcing your stitches so tightly that inserting the hook becomes uncomfortable.
Choose the Recipient’s Colors
If the keychain is a gift, decide on the skin tone and hair color at the start. It is much easier to plan the palette now than to replace a finished hair cap later.
For your first version, keep the yarn type consistent and focus on following the construction.
Keep the Written Instructions Beside You
The PDF explains that its step images are illustrative references and that some show generic crochet shapes. Use the written rounds, counts, and color-change notes as your working reference.
This matters particularly at the transition between the body and head, which must remain connected.
How to Make a Crochet Nurse Keychain: Step by Step
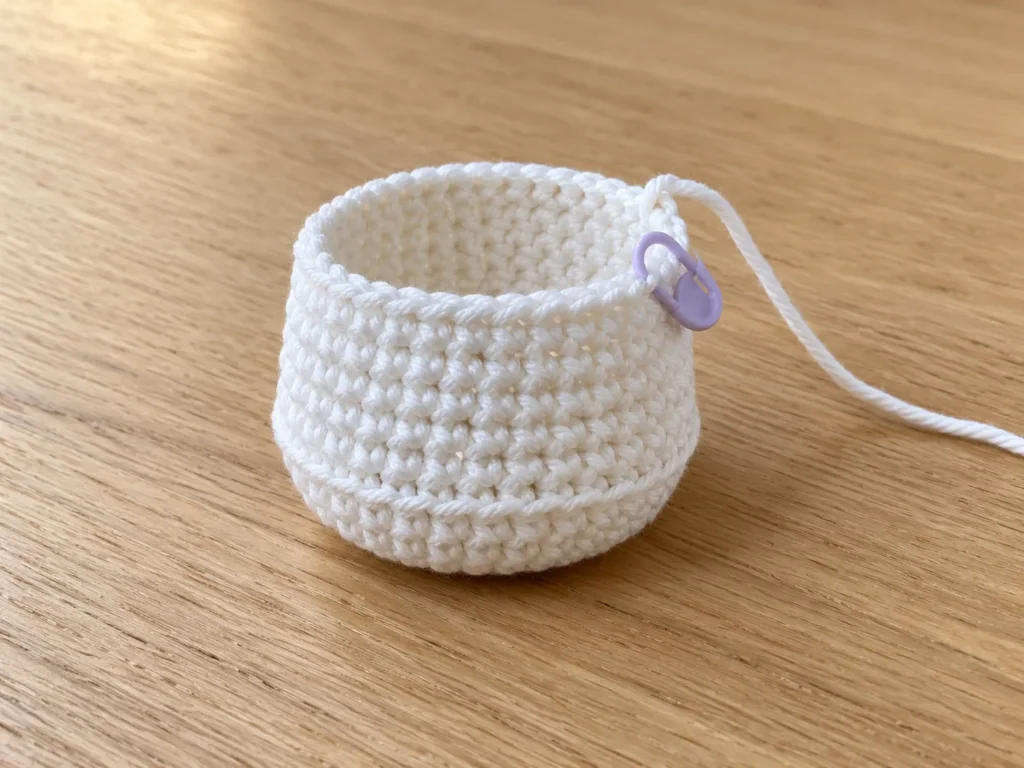
Step 1: Begin the White Uniform Base
Start with white yarn and build the base in continuous rounds.
The early increases expand the small center into the bottom of the uniform. A back-loop-only round then creates a subtle ridge between the base and the rising body.
Count your stitches after each increase round. An error near the beginning can affect the shaping and placement of later pieces.
Once the base is established, continue upward according to the PDF.
Step 2: Shape and Stuff the Body
Continue the white body before narrowing the upper section toward the neck.
Add stuffing while the opening is still accessible. Use small amounts and spread them evenly so the body keeps a smooth outline.
Pay attention to the lower corners and sides. Uneven stuffing can make the finished character lean or give the uniform an irregular shape.
Keep the neck opening accessible for the next stage. Do not close the body and begin a separate head.
Step 3: Change to Skin-Tone Yarn and Build the Head
The head continues directly from the body after the color change.
Follow the PDF’s transition instructions, then work the increases that widen the head. Keep the color change tidy and check the stitch count after each shaping round.
As the head expands, the piece may feel top-heavy before it is filled and finished. Support it comfortably in your hand rather than pulling on the narrow neck.
This continuous construction is a defining feature of the nurse keychain crochet pattern.
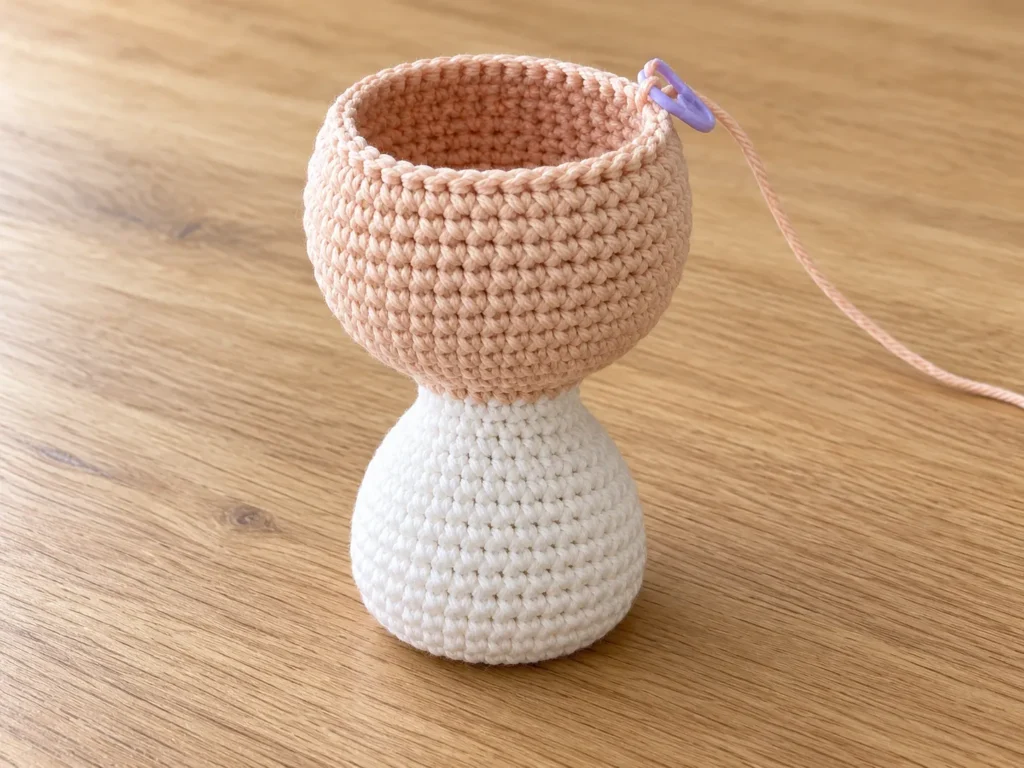
Step 4: Position the Eyes Before Closing the Head
Work the even rounds that establish the face, then position the eyes using the PDF’s placement guidance.
Check both eyes from the front before fixing them permanently. Also look at the head from slightly above to make sure the features are centered relative to the body.
The placement reference in the PDF counts from the skin-color change. Keep that separate from the overall round numbering.
A small adjustment here can make a noticeable difference to the finished expression.
Step 5: Stuff and Close the Head
Add stuffing before the opening becomes too narrow.
Distribute the filling around the face and crown, then follow the decreasing rounds. The head should look rounded without stretching the stitches apart.
Continue checking the profile as you work. If one side looks flatter, redistribute the filling before adding more.
Finish and secure the final opening as described in the PDF, then hide the yarn end neatly inside the head.
Step 6: Add the Facial Details
The pattern includes optional eyelashes, a lower eye line, and blush, along with a small embroidered nose.
Work slowly and use small stitches. On a little amigurumi face, a few strands can change the expression more than you might expect.
If adding cheek color, test it on a yarn sample first and apply it lightly. Make sure the embroidery ends are secured and hidden.
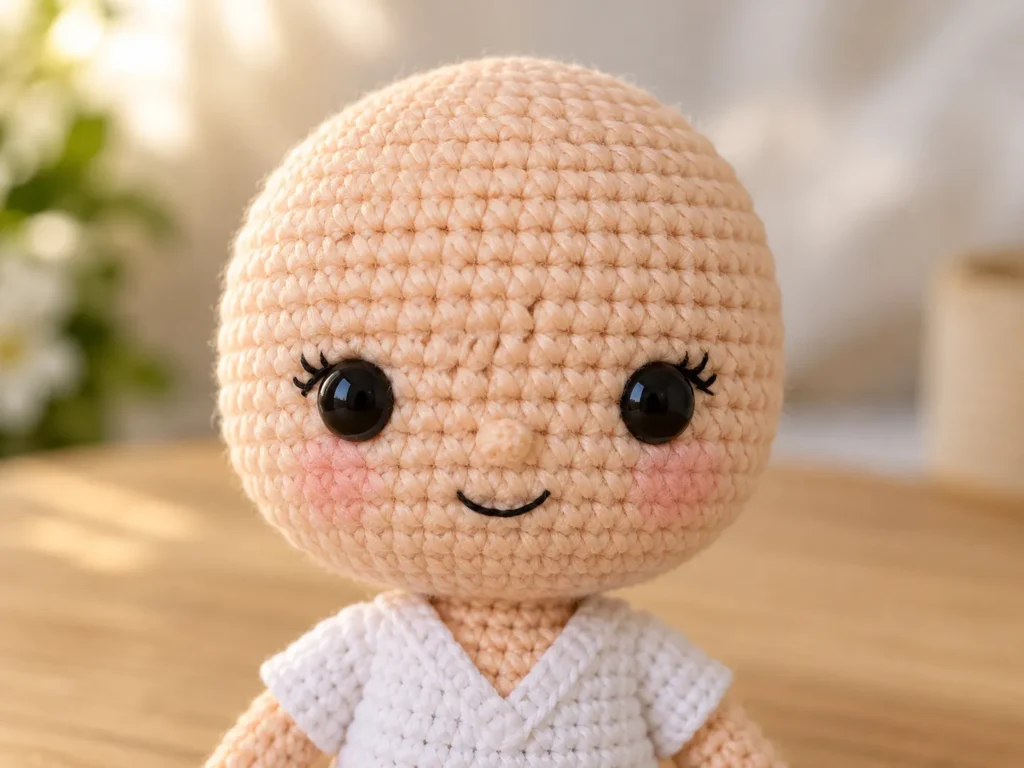
Keep the exact instructions beside you as you work.
Get the Complete Nurse Keychain PDF Pattern → [Click here]
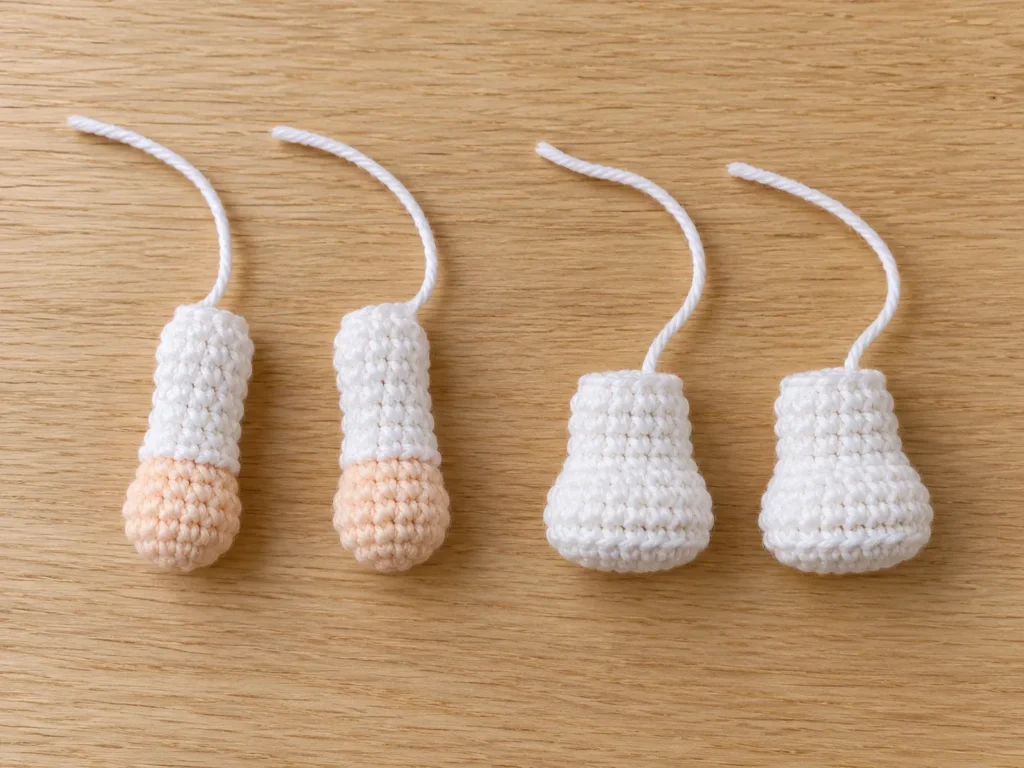
Step 7: Crochet the Two Arms
The arms begin in the chosen skin color for the hands, then change to white for the sleeves.
Follow the loop-specific instruction at the color transition. It helps establish the sleeve detail rather than treating the arm as a plain tube.
Make both pieces before attaching either one. Compare their length, fullness, and color-change position.
Add only the small amount of stuffing directed in the pattern. Overfilled arms can become stiff and harder to place naturally against the body.
Step 8: Crochet the Two Legs
Make the matching white legs separately.
A back-loop round helps define the sole. Follow the shaping, leave the sewing tails, and add a little stuffing.
Before sewing, place both legs against the body and check their height and angle. The PDF gives attachment references and spacing guidance.
Attach them securely without pulling the body out of shape. Recheck the balance before hiding the sewing ends.
Step 9: Make and Fit the Hair Cap
The hair is a separate crocheted cap that fits over the completed head.
After the increasing section and even rounds, the final shaped round creates the fringe. This edge uses a specific combination of stitches, so follow the sequence carefully.
Test the cap on the head before sewing. Turn the fringe toward the front and check that it frames the face without covering the eyes.
View it from the front, sides, and back. Once the position looks balanced, sew it securely in place.
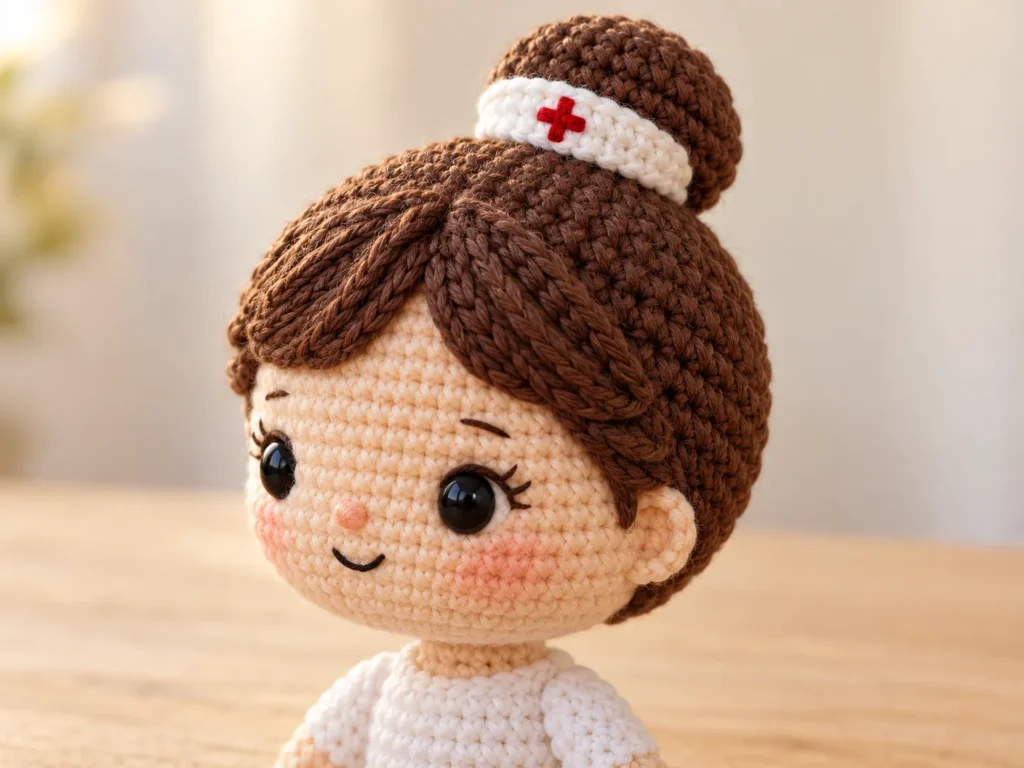
Step 10: Make the Bun and Decorative Band
The small bun is made separately, lightly stuffed, and attached to the hair cap.
Place it on top of the head before sewing to check its position. It should sit securely and leave room for the keychain attachment.
Next, make the white decorative band and add the embroidered detail described in the PDF. Wrap the band around the bun and position the front detail where it is clearly visible.
Sew the band neatly and hide the ends.
Step 11: Complete the Assembly
If the arms are not yet attached, position them at the sides using the PDF’s round references.
Check the whole character rather than each piece in isolation:
- Are both arms at the same height?
- Do the legs sit evenly?
- Is the hair centered?
- Does the bun sit securely?
- Are the facial details unobstructed?
Sewing should hold the pieces firmly without creating deep dents in the body.
Step 12: Attach the Keyring and Inspect the Finish
Secure the keychain hardware at the bun using strong thread, following the assembly guidance.
The connection should hold through several secure stitches rather than relying on one loose yarn loop. Inspect the bun attachment as well, since it supports the hardware.
Gently check the seams and connection points. Trim or hide remaining ends, and make sure no pins or loose components remain.
Your finished nurse keychain is ready for its final inspection and gift presentation.
Personalize Your Crochet Nurse Keychain
Changing the palette is a simple way to make the same nurse keychain crochet pattern feel personal.
The PDF’s inspiration gallery shows four hair-color directions:
- Cocoa brown.
- Midnight black.
- Honey blonde.
- Copper red.
You can also choose a skin tone that resembles the recipient and decide whether to add the optional facial details.
These variations use the same underlying pattern. Keep the yarn thickness consistent so a color change does not unintentionally change the size of a piece.
For a gift, pair the keychain with a short handwritten message. Mentioning the graduation, new role, or act of kindness behind the gift makes it more meaningful than elaborate packaging.
Common Problems to Check
Stuffing Shows Between the Stitches
Review the fabric density and the amount of filling. Adding more stuffing to a loose fabric usually makes the gaps more visible.
The Head Leans
Check that the stuffing is balanced and that the neck area has appropriate support. Remember that this design uses a continuous body-and-head piece.
The Hair Covers the Eyes
Reposition the cap before securing it. Make sure the shaped fringe is facing the correct direction.
The Arms Look Uneven
Compare the two pieces before sewing, then check their attachment height against the body. Matching arms can still look different if one is placed higher.
The Keyring Pulls on the Bun
Inspect both the hardware connection and the seam joining the bun to the hair. Reinforce an insecure attachment before using or gifting the keychain.
What’s Inside the Nurse Keychain Crochet Pattern PDF?
The 22-page PDF brings the written instructions and supporting references together in one place.
It includes:
- A materials and tools checklist.
- Stitch abbreviations with US terminology.
- Round-by-round body and head instructions.
- Directions for the arms and legs.
- Hair cap, shaped fringe, and bun instructions.
- Decorative band instructions.
- Facial finishing suggestions.
- Assembly and keyring guidance.
- A final quality checklist.
- Four hair-color inspiration ideas.
- Space for your project notes.
The booklet’s step images are illustrative references. Follow the written stitch counts and construction notes when making the project.
You are purchasing a digital crochet pattern, not a finished keychain. One pattern is included, with four colorway ideas.
Frequently Asked Questions
Is This Nurse Keychain Crochet Pattern Suitable for Complete Beginners?
It helps to know how to work in continuous rounds, increase, decrease, and sew small pieces together. The fringe also uses taller stitches.
If these techniques are new to you, practice them before beginning the full project.
Are the Head and Body Made Separately?
No. The white body transitions directly into the skin-tone head as one continuous piece.
What Hook Size Does the Pattern Use?
The PDF lists a 2.5 mm hook. Yarn choice and tension still affect the density and finished size.
How Big Is the Finished Nurse Keychain?
The PDF does not provide a verified finished measurement. Your result will depend on your yarn, hook, and tension.
Does the PDF Include Four Different Nurse Patterns?
No. It contains one nurse keychain design with four suggested hair-color variations.
Does This Article Include the Complete Pattern?
No. This article explains the project stages and offers supporting tips. The paid PDF contains the exact round-by-round instructions, stitch counts, and assembly references.
Conclusion
A crochet nurse keychain is a small project with room for a personal touch. The continuous body and head establish the shape, while the hair, facial details, and careful finishing give the character its personality.
Choose colors with your recipient in mind, check the alignment before sewing, and give the keyring attachment the attention it needs.
Ready to turn your yarn into a thoughtful handmade keepsake? Get the Nurse Keychain Crochet Pattern PDF and keep the detailed instructions beside you from the first round to the final stitch.
Get Your Nurse Keychain Crochet Pattern PDF → [Click here]
Save this project to your Pinterest crochet board so you can find the overview and finishing tips when you’re ready to begin.